Thursday, February 16, 2012

New York Steak and Quick Roasted Potatoes

It's been a busy time at work for me, so cooking elaborate (or even not-so-elaborate) meals for myself has definitely not been a possibility. That's why I'm here to tell you about one of my favorite "quick" meals, which can be prepared in about 30 minutes. I know, I know, Jamie Oliver can prepare a 4-course meal in that amount of time, but I'm no Jamie Oliver. I do, however, take advantage of his trick with quick-roasted potatoes to make this meal!

New York Steak and Quick-Roasted Potatoes

First, I want to share my favorite way of preparing great steak in your oven. It's actually my dad's method, and if grilling's out, this is the next-best thing, especially because it's not fussy at all. First, marinate your steak. I basically rub sugar, seasoned salt, pepper, and soy sauce over both sides, then let it sit in a baggie or on a plate. When you're ready, stick the steak on a pan -- I used cast iron this time -- and place it directly under your broiler. Turn it up to about 450°F, or "high." You do not need to preheat (I know, isn't it awesome?). For a steak about an inch thick, cook for about 8 minutes. Flip the steak over, then cook for another 6 minutes for medium rare steak, or until the meat is how you'd like it. Note that cooking times will also vary depending on the thickness of your steak and if you use cast iron. If you do use cast iron, it may cook a lot faster, so you'll want to adjust times accordingly. Once the steak is out of the oven, transfer it to a plate and let it sit for 5 minutes to allow the juices to settle.

New York Steak

While the steak is marinating, make the quick-roasted potatoes a la Jamie Oliver. Quarter 6-8 red potatoes. If the potatoes are large, cut them into sixths or even eighths. Place them in a deep pan and cover with water. Turn the heat up to high and get the water boiling. Simmer for 10 minutes, or until the potatoes are tender enough for a fork to pierce them easily. Drain the water. Return the potatoes in the pan back to the stove over medium heat. Add some canola or olive oil, salt to taste, and about a tablespoon of butter. Cook for 2 minutes. Use a metal turner and stir up the potatoes without breaking them. They may stick a bit; that's good, it means they'll be turning nice and brown. Turn them every 2 minutes. Depending on your heat, this will take 20-25 minutes. If you've timed things right, they should be done about the same time as the steak.

Quick-Roasted Potatoes

You can also fancy things up a bit, if you like ... for instance, I had some homemade herb butter, so I placed a dab of that on top of the steak when it was having its rest. I also had some cherry tomatoes I needed to use up and some caramelized onions I'd made the other day, so I threw those in with the potatoes in the last 5 minutes or so.

And don't let those steak drippings go to waste; that would be a crime! Transfer them to a small pan (or if you used a cast-iron pan, just use that) and set over medium heat. Add a tablespoon or two of flour and cook for a minute or two, stirring. Gradually add about a cup and a half of beef stock (in my case, made in 30 seconds with Better than Bouillon beef base), stirring constantly, for a wonderfully rich brown gravy. Serve with steak and potatoes or reserve for another use!

A very quick, delicious, and satisfying meal.

Source: http://returnoftheyummy.blogspot.com/

Cook Steak - Look Mom, No Grill!

Like my new logos? My friend Kiko Sanchez at Kiko Productions designed them for me.

This week started off with great promise. I was going to spend my last week of unemployment grilling all kinds of good stuff. I had menus planned and purchased all of the ingredients I needed to create some grilling masterpieces. But I overlooked one small detail, I did not consult the weather forecast for this week. That uber-artic-storm that has gripped most of the country also attacked New Mexico. New Mexico is one state that is not prepared to deal with cold weather, me included. I thought I was a no excuse grill guy, but I have to admit I’m not. It has to be at least 45F and no wind for me to grill. Needless to say the weather put the kibosh on my outdoor grilling plans.


So, I've got two nice NY Strip steaks sitting in my fridge. How am going to cook a great steak without going outside and freezing my tokhes off? Then I remembered this great trick that Alton Brown used on one of his steak episodes. I had tried it several time's before and thought now was a great time to try it again. For all of you fair-weather grillers and snowbound people, I’m going to show you how to cook a great steak that will hold you over till better grilling weather arrives.

The No Grill Steak
You are going to need:
A cast iron skillet
2 Steaks, NY Strips Choice Grade
Peanut Oil
Seasonings, AlbuKirky BBQ Rub.
Your Oven

Start by placing the cast iron skillet in the oven and preheat to 450F. Leave the skillet in the oven for at least 20-30 minutes. You need a really hot skillet to put a good sear on the steaks.

To season the steaks start with coating them with the peanut oil. If you do not have peanut oil you can use any high smoke point oil like corn oil or canola oil. Season the steaks liberally and rub the seasoning into the meat to form a good crust. DO NOT USE OLIVE OIL! It will burn, smoke up your kitchen and ruin your steaks.


Now turn on the largest burner on the stove top to high or medium high setting and let it come up to temperature. USE A POTHOLDER and take the skillet out of the oven and place it on the hot burner. Pour about a tablespoon of oil in the pan and swirl the pan around to coat the bottom evenly. Watch for the oil to start to smoke. Be very careful with the skillet, it’s hotter than a $2 pistol. I was lucky, I only burned myself once.

When you see the first little wafts of smoke coming from the skillet place the steaks in the pan. Sear the steaks on each side for about two minutes. You can see in this picture the crust that forms on the steak. After the steak has seared on both sides, place the pan back in the oven and cook for 3-4 minutes. After 3-4 minutes remove the pan from the oven, flip the steaks and return to the oven for another 3-4 minutes. Remove the skillet from the oven and place the steaks on a cutting board or plate to rest for at least 5 minutes to rest before serving.

This is the first time I’ve used my seasoning mix with the cast iron skillet trick. I was really impressed with the outcome. There is just enough sugar in the blend to create a nice caramelizing in the crust. The cast iron also brought out some of the other spices adding a really nice toasty spice flavor to the steak. It was pure beefy goodness!


So there you go fellow fair-weather and snowbound grillers. You can have great steak without leaving the comfort of your cozy little kitchen. All you need is some good steaks, seasonings, your oven and a cast iron skillet. Just don't burn the crap out yourself on the skillet.


Source: http://albukirky.blogspot.com/

I cooked: Steaks on the Barbeque

After tasting the fantastic steaks from Prime, Hubby was convinced that we should start cooking our steaks on the barbeque. Since this was going to be our first time cooking steaks over a charcoal grill, we searched on the internet for timings for medium rare and medium steaks. For a 1 inch steak, 2-3 minutes on each side was recommended for medium rare and 4-5 minutes for medium.

Grilling a steak is not as easy as it sounds, and definitely takes practice to perfect. I think it depends very much on your grill, so it may take a few trials before you achieve the desired doneness. Following the recommended times, 2 minutes each side on the grill actually gave us a medium steak (and not medium rare). So, we shortened the cooking time to 1 1/2 minutes each side during the next round and produced medium rare steaks.

I will probably invest in an instant-read food thermometer soon to help me in my quest of cooking the perfect steak. Using a food thermometer to measure the internal temperature of the steak would probably be the best way to tell the doneness of the steak. (Core temperature of 55°C for medium rare and 60°C for medium)


Medium steak - pink hot centre


Medium rare steak - red warm centre


How to Grill a steak on the BBQ (The Basics)

1. Choose a steak with thin streaks of fat running through as this soft internal fat will partially melt during cooking, avoiding the steak from drying out.

2. Allow the steak to reach room temperature before grilling it. The meat can become tough if it goes straight from the fridge to the barbeque. Season the steaks with some olive oil, and black pepper just before cooking.

3. Fire up the barbeque and wait until the charcoal turns an ashy white. As a general guide, you should be able to hear a sizzle as the steak hits the hot surface. The heat seals the surface, trapping the juices inside.


Flip over once only

4. Cook the steak on the barbeque to your preferred doneness, using long-handled tongs to turn the steak.

5. Let the steaks rest for 5 minutes before serving. This allows the juices to distribute evenly throughout the steak, keeping it juicy and tender. Season with salt and serve with your choice of side dishes.


Steaks cooked on a charcoal grill definitely beats one cooked in the oven grill.


Grilled corn


Source: http://goodyfoodies.blogspot.com/

Fleisher's Follow-up, or Down to the Bone

this is our steak fig. a: on the cutting board

Without question, the finest steak either of us has ever tasted. We only got one because we knew we wanted to eat it relatively soon, and because Fleisher's dry-aged rib steaks were the biggest, meatiest rib steaks we'd ever had the pleasure of purchasing. We knew one of those honking steaks would be more than enough for the two of us, and we were right. We ate and ate well, and we still had enough for leftovers (yes!) the next day.

And, the thing is, buying, cooking, and eating grass-fed beef from a place like Fleisher's is not only ethically and environmentally sound, it's also a game-changer. Once you get that taste, why would you want to eat anything else? I'm happy to hold out until the next time we get a chance to visit Fleisher's. Why would I want to settle for less? Hell, I can still taste that steak right now as I write.

this is our steak in our searing-hot frying pan fig. b: in the pan*

We cooked our rib steak exactly the same way we always cook our rib steaks: first in a searing-hot cast-iron pan, then in the oven, followed by a good 5 minutes of rest. This is an excellent way to prepare perfect steaks at home and it happens to be exactly the way Fleisher's recommends preparing their beef. Once again:

1. Oven preheat 300º [10 minutes]
2. Heat pan on stovetop to smoking point
3. Pre-salt each side [5-10 minutes ahead of time]
4. Put into pan / sear for 2 minutes each side
5. Put steak into oven w/ pan
6. Steak > 4-8 minutes in oven [120º]
7. Take out of oven--let sit [rest] for 5 minutes


That steak was so tender, so tasty, so good, there wasn't a scrap left.

aj

* Just to give you some perspective: that's an oversized 13 1/4" Lodge cast-iron pan.

Source: http://endlessbanquet.blogspot.com/

Warm Skirt Steak Salad


ingredients:

1 pound skirt steak or flank steak
12-15 cherry tomatoes
12-15 sweet yellow tomatoes
1 bunch asparagus, cut in half
2 shallot, finely chopped & divided
3-4 garlic cloves, smashed and roughly chopped
3 tablespoons olive oil
salt and pepper to taste
1/2 cup blue cheese or gorgonzola cheese
a Bag of you favorite salad mix

directions:

Preheat the oven to broil.
Place the steak on a parchment-lined baking sheet along with the tomatoes, asparagus, shallot and garlic. Cover everything with olive oil and salt and pepper. Place the steak and veggies on the top rack of your oven.


After about 7 minutes, flip the steak over and continue to cook for another 5-7, depending on how you like your steak cooked.
Remove from oven and let rest for 15 minutes or so. You want it to cool slightly more than a normal "resting" time, so the lettuce doesn't completely wilt.
While that is resting, fill a serving bowl with the bag of salad. Dress with your favorite oil and vinegar or other salad dressing. I used a balsamic vinegar and the other shallot, along with some salt and pepper.
Slice the steak against the grain, and place on top of the salad. Add tomatoes and other veggies. Top with the blue cheese/gorgonzola.


ENJOY!!


adapted from a recipe I saw on pinterest, cheeky kitchen

Source: http://tastebudsnblossoms.blogspot.com/

Cooking: Steak Dinner

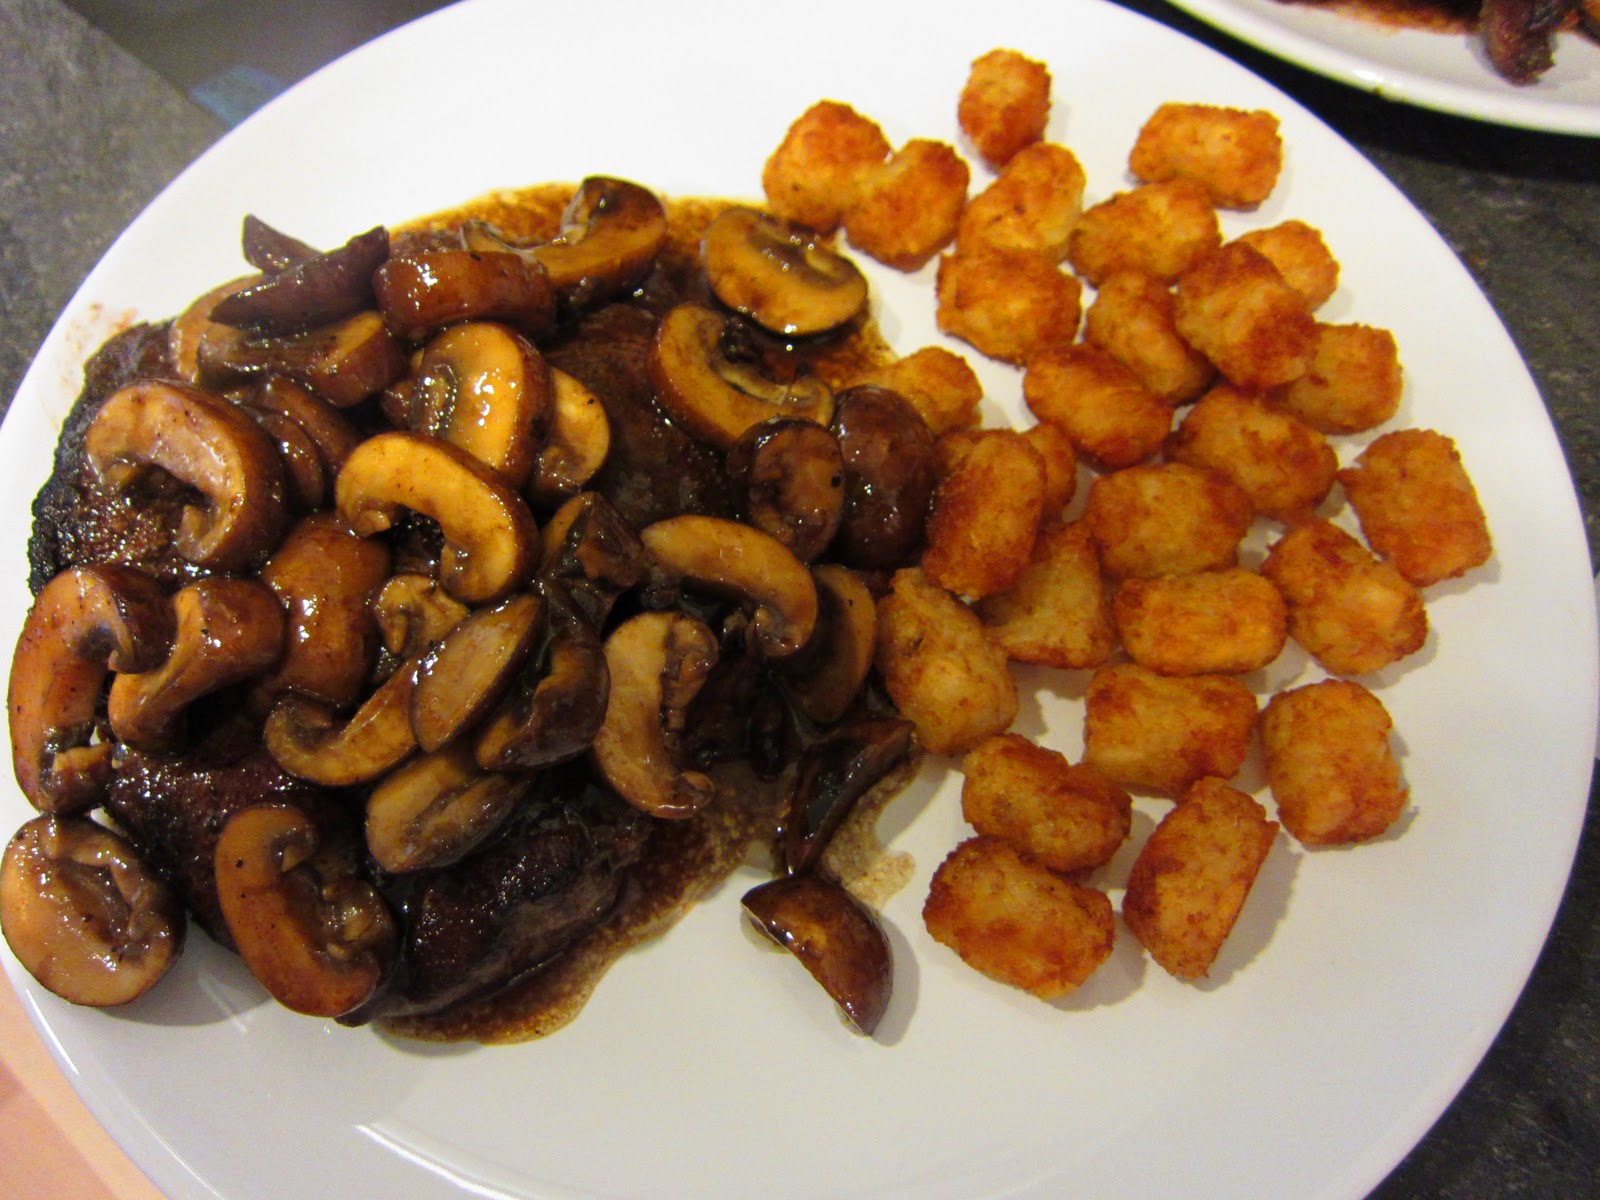
Many people don't realize how easy it is to make a decent steak dinner at home. Now, don't expect superb NYC steakhouse quality here. Why? I don't have convenient access to their prime dry aged meats. And my stove nor oven goes up high enough for that quality. However, making steak at home is much cheaper and can rival some of the more mainstream places that you or I may frequent. So on the menu this night: steak with mushroom marsala wine sauce and a side of tator tots.

I actually started off with heating the toaster oven for the tator tots. I won't show you the steps to do that because they were frozen tots and I followed the instructions on the bag. Easy said and done. And now onto the more difficult portion, the steak. Please keep in mind that this steak recipe works best for fattier cuts of beef like rib eye and strip. If you like filet mignon, do not use this recipe. It will come out tough and dry. Okay, enough of the warnings, now onto directions.

Take the meat out of the fridge and let it come to room temperature. It takes about an hour. While the meat comes up to temperature, turn on your oven to 450oF. Yeah, it's high but it's what you need. Then liberally salt and pepper the steaks on every exposed surface. Also add some olive oil for grease.

Here's a nice tip: using a larger grained salt here works best. So think sea salt instead of table salt. This also goes for freshly ground black pepper.
Heat up a pan until screaming hot. I mean so hot that when you put your hand over (not on) the pan, it's too hot to keep it there. Add your oil. Use an oil with a higher smoking temperature like canola or peanut. Please your steaks carefully in. If you're afraid of burning yourself, use a pair of tongs. Once the meat touches the pan, you should hear it sizzle and see some smoke/steam. This is good. It's forming that lovely crust already. To keep that crust, do NOT touch the steaks. I mean do not move them at all. Do not take a peek to see if it's browned enough. Do not poke at it with the tongs. Just leave the damn things along so they can work their magic!

Helpful tip: use a regular (not non-stick) or cast iron pan with low sides. I find that non-stick pans cannot produce the kind of crust that you want. And pans with higher sides tend to steam the food as opposed to letting the water/moisture evaporate.
After a few minutes (about 5 or 6 depending on how thick your meat is and how you like it cooked), flip your meat. Again, do not touch the damn thing. Let the crust form on the other side. Now take a look at that beautiful caramelized color there. Looks Burned? No fool! It's not black. It's brown. Brown, flavorful, and delicious! Now carefully take the whole pan and put it in your pre-heated oven. A few minutes later (3-4 minutes or so), take it out.
Take the steak off of the pan, and let it rest on a cutting board or plate. This allows the meat juices to run back inside. This keeps the steak juicy and flavorful. Patience is a virtue when it comes to food.
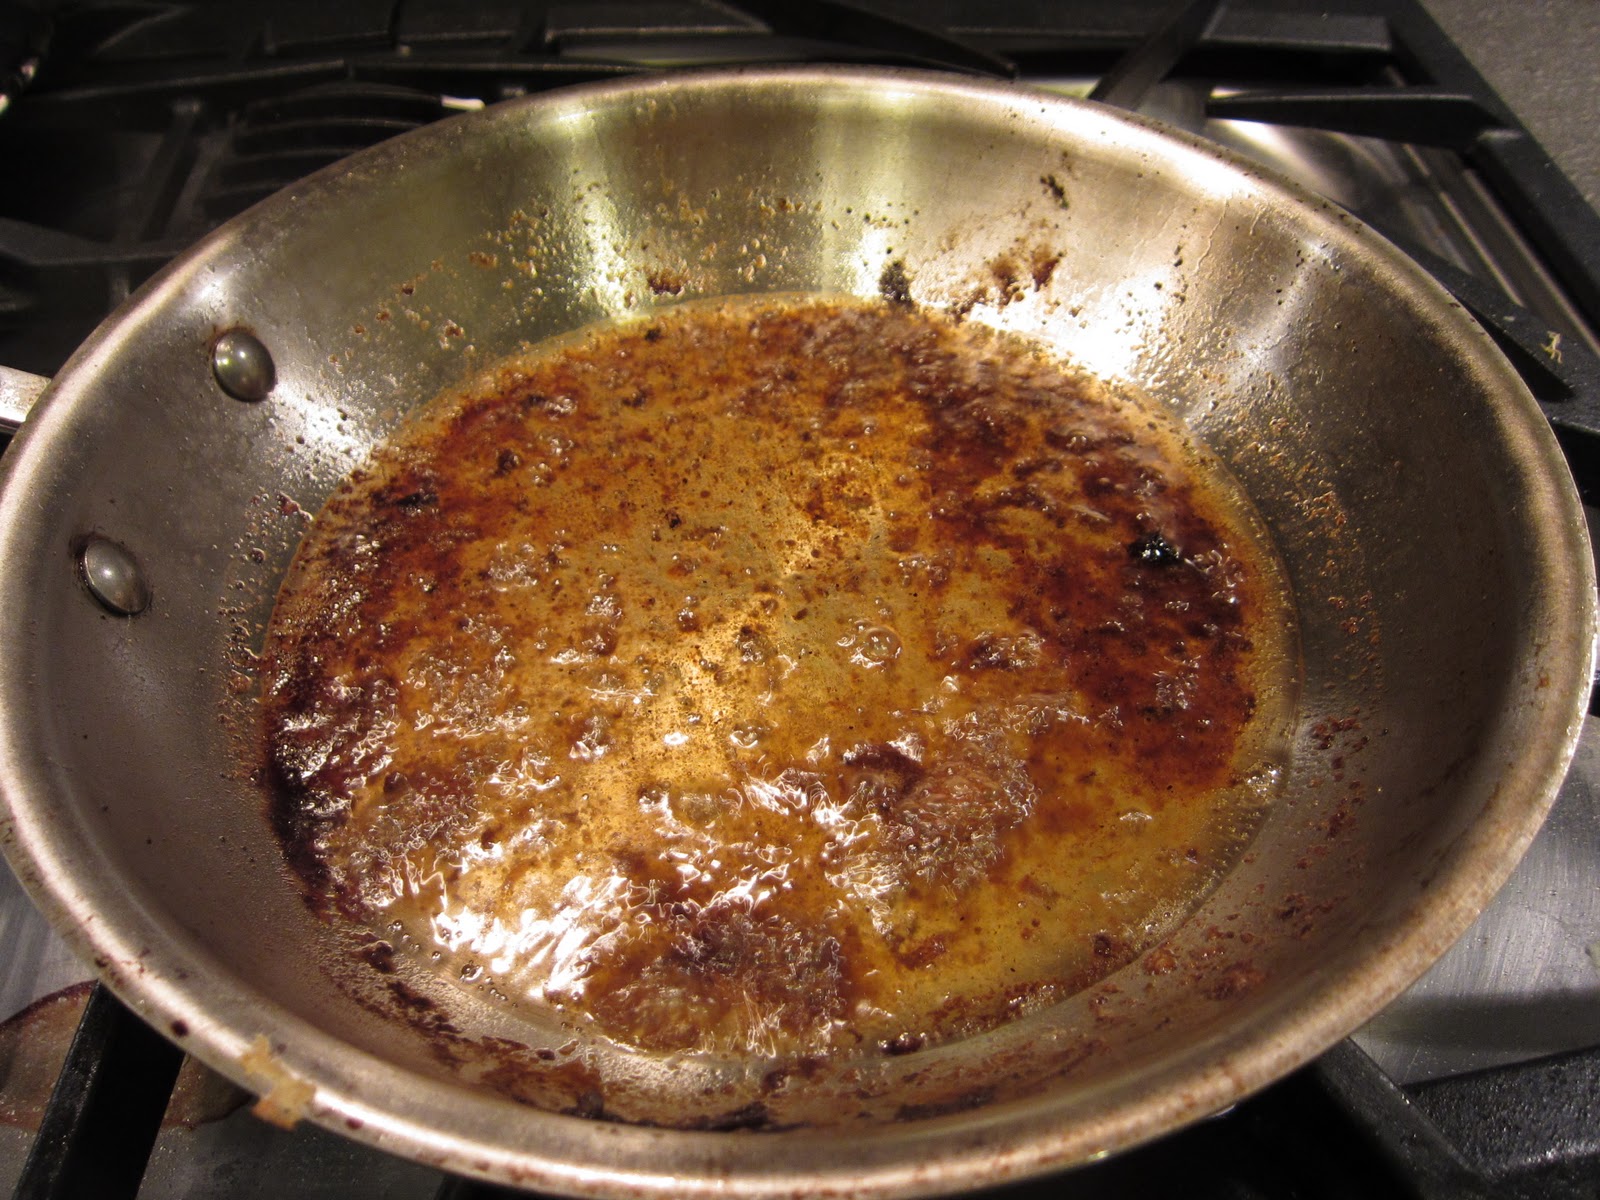
While the steaks rest, make the sauce. Skim off any excess oil from the pan. Be sure to keep all the juices and browned bits on the bottom.
Chop up some mushrooms. I used baby bella here. I find that they have a deeper flavor than regular white button mushrooms.
Into the got pan they go! Slowly cook them down until softened.
And then add your wine. I'm using marsala wine here which is sweeter, but a red wine would also work.
Pour some wine in until the mushrooms are slightly covered. Be sure to scrape up any browned bits from the bottom of the pan. Then let the sauce simmer until reduced and thickened. Keep in mind that the sauce will be thicker once cooled.
And here's my finished sauce. Look at those loved mushrooms that has absorbed all that beef and marsala wine flavor. And that sheen! Yes kids, that sheen is from lovely steak fat.
Plate your steak and tator tots which should be nicely golden and crispy now. Spoon the mushroom mixture over the steak liberally. Viola! Steak dinner!
So this is the inside of my steak. I would think that's medium which is a little more than what I would have liked. I'm more of a medium-rare type of steak lover. Not bad though. Next time, a little less cooking time.
The steak was juicy and so good. The mushrooms and marsala wine just made it so much better. The thick crust that formed on the steak held up to the sauce really well. So happy with this meal. It's nice to have a proper dinner once in awhile. And it wasn't difficult nor expensive. Good eats, indeed!

source: http://tasty-eating.blogspot.com/

Country Oven-Fried Steak

For readers outside of the U.S. (and probably some American readers too), Country Fried Steak is one of the truly great comfort foods of the south. It’s a delicious, stick-to-your-ribs meal built around a steak that has been "tenderized" (a genteel culinary term for having the living daylights beaten out of it by a stressed cook wielding a spiked hammer that looks like something out of a horror movie or fetish shop) then dredged, breaded and fried in the style of fried chicken, and finally smothered in gravy. It differs from Chicken Fried Steak in ways that no one can agree on: some say it’s in the gravy (brown vs. white); others claim it’s in the breading (buttermilk vs. egg); and still others insist there’s no difference at all. The one thing almost everyone agrees on is that, in either form, it’s a meal that can start off by warming your heart, and end up stopping it.
This brings us to Country Oven-Fried Steak, the version presented below. Rather than being pan-fried, it’s baked in a manner sometimes called “oven-frying.” Another difference is in the gravy, which either version must be smothered in to have any chance at authenticity. In the fried version, the gravy is generally made from pan drippings by adding flour, etc., in the usual way. In the baked version there are, of course, no pan drippings, so you’ll see that the gravy is prepared separately using beef broth.

This recipe, as with many Country Fried Steak recipes, calls for the steaks to be placed in about a cup of buttermilk before the breading is applied. Since buttermilk is usually available only in containers of a quart or more, unless you plan on using it for other things too you’ll end up throwing out most of the container. To avoid this, it’s possible to make acidulated milk and use it as a substitute for the buttermilk. Just take a cup of room temperature milk – I use skim and it works just fine – add a tablespoon of white vinegar and let it rest for about five minutes. (The process is a kind of controlled curdling.)

As for side dishes, many are possible, but mashed potatoes (smothered in gravy, just like the steak) are pretty traditional. In the photo, I’ve also plated my steak with glazed salt-and-vinegar carrots and buttermilk biscuits. I don’t have a recipe for the mashed potatoes – improvising them is way too much fun for that – but I’ll be posting recipes for the carrots and biscuits next week.

This recipe makes four servings.

Preheat your oven to 400 degrees. Put your baking sheet in the oven to heat it.

Using a tenderizing mallet, tenderize 1-1/2 pounds of beef round steaks until they’re about ¼” thick. Cut them into four servings.

Combine ½ cup Panko and ½ cup plain bread crumbs with ¼ teaspoon of ground black pepper in a 1 gallon zip-lock bag. Put 1 cup of buttermilk (or acidulated milk) in a shallow pan.

Combine ½ teaspoon of kosher salt, ¼ teaspoon of ground black pepper, and ¼ teaspoon of garlic powder, and season both sides of the tenderized steaks. Dredge each steak in the buttermilk, shake off excess, and coat with the breadcrumb mixture, pressing the breadcrumbs in. If they don’t seem sufficiently coated, give them a second buttermilk-breadcrumb treatment. Let the coated steaks rest in refrigerator for at least 20 minutes.

When the steaks have finished resting, spray your preheated baking sheet with cooking spray. Place steaks on the baking sheet and spray the tops lightly. Bake until the coating is golden brown and crispy, about 20 minutes, turning half-way.

While steaks are baking, prepare gravy in a skillet as per the recipe below, but dont let it completely thicken. When the gravy is ready, add the steaks and bring it to just boiling over medium-high heat.

When the gravy has started boiling, reduce the heat to low, put ½ a bunch of chopped green onions on top of the steaks, cover and simmer for 30 minutes. Serve the steaks hot, remembering to add gravy to them and to your mashed potatoes.

To make the gravy:

In a medium saucepan, combine a 15 ounce can of beef broth, 1 tablespoon of fresh chopped rosemary, and 2 tablespoons of Worcestershire sauce. Bring the mixture just to a boil, then reduce to a simmer.

Make a slurry of 2 tablespoons of corn starch dissolved in ¼ cup of water and add to the broth mixture. Add ½ teaspoon of garlic powder, and cook until thickened to consistency of cream.

Whisk in 2 tablespoons of butter substitute, a little at a time, and cook a few minutes more to the desired thickness. Add salt and pepper to taste.

Hope you enjoy this comforting delight!

As always, if you’d like a cookbook style, notebook-ready copy of this recipe, send me a note or a comment with your e-mail address and I’ll send it right along.

And also as always, till next week, stay well, keep it about the food, and always remember to kiss the cook. ;-)

source: http://kissthecook-ben.blogspot.com/